


I sure do hope that you have enjoyed this years Halloween tutorials!
I have made some pretty cool Halloween cakes in the past and just wanted to share them on here.
Zombie Cupcakes
My first halloween cakes where these back in 2012:
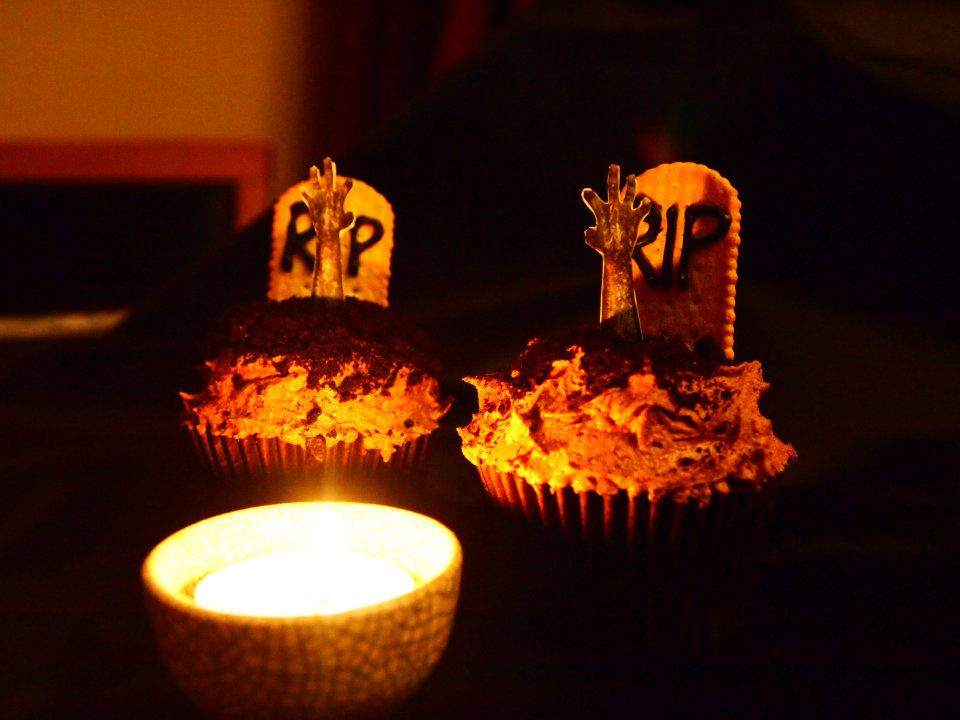
The first ones were alright, they were super easy to do as you just needed a biscuit and writing icing to make the gravestones.
Jump ahead a year to the new improved version:
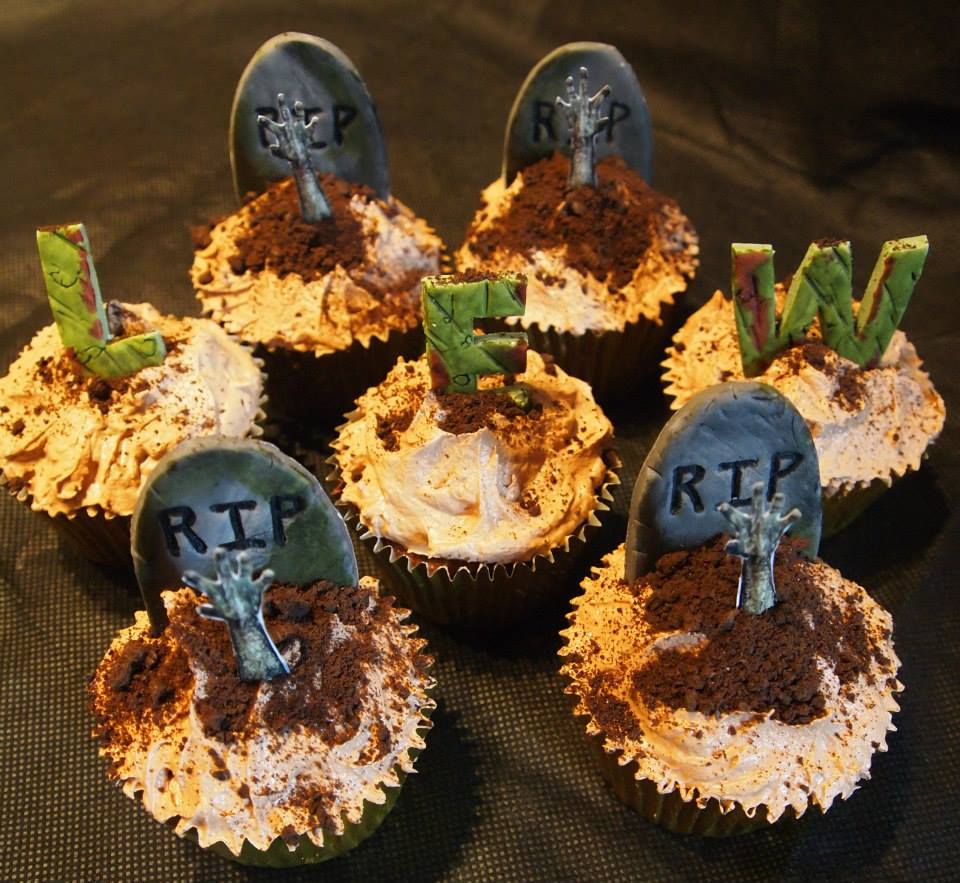
Now i’m cheating here really, these were actually for my friends birthday. He loves zombies so they were a perfect fit.
As you can see with the second attempt – I had improved the gravestones choosing to make them out of sugar paste, which I then dusted up to look like gravestones.
Both used zombie hands made by Alana at ‘Sunshine and Bones‘ All you need to do is print out the sheet of zombie arms from her blog, cut them out and glue down with a toothpick in the middle.
I have to say I haven’t found any as good as hers since. They are a little fiddly to cut out but they are worth it.
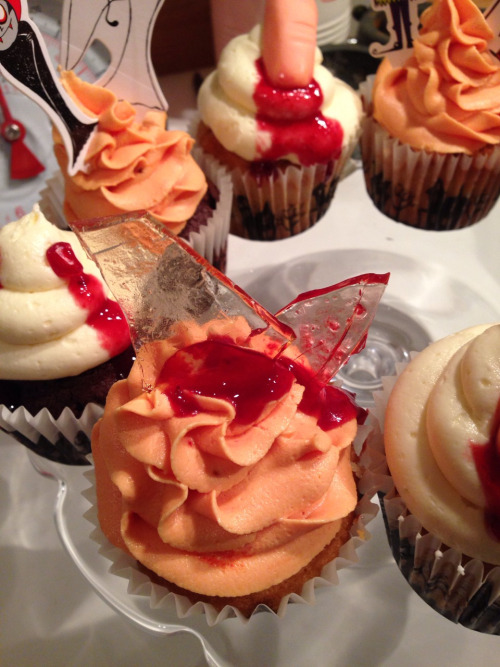
Shattered Glass and Severed Fingers]
For Halloween 2014 I decided to take some inspiration from Lily Vanilli and her book “A Zombie Ate My Cupcake”
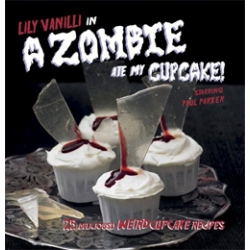
I have had this book for years and really wanted to give the cakes on the cover a try.

The blood is actually cherry sauce, and the glass in made of sugar and liquid glucose.
For both, the recipe can be found here on Lili Vanilli’s Website.
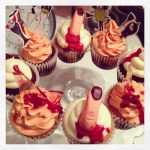
I decided to put my own twist on these y making some fingers made from modelling paste. For these I followed on from the principles of this monstrosity…

ARGH! There’s a zombie in the cake
This is still one of my all time favourite cakes, again this was a birthday and as it happens was my first proper cake that I had made.
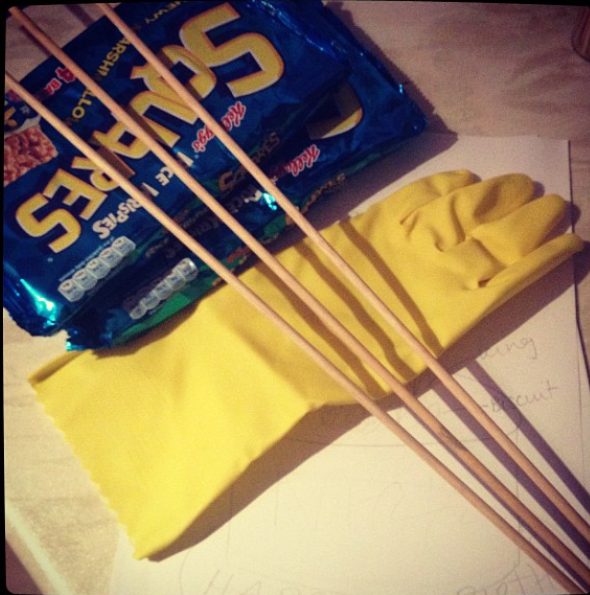
The hand was really simple to make. You only need a could of tools to do so:
- Modelling paste (or sugar paste mixes with tylo) in colours of your choice – I chose green for the skin and yellow for the finger nails
- about 8 packs of rice krispie squares – you probably won’t use them all I just can’t remember how many I used…
- Dowling
- Rubber glove – hand of your choice
- bone tool and blunt knife
- food colouring and dusts- black, red, green, yellow.

Start by heating up the rice Krispie squares in a bowl in the microwave. Do this on a low heat as you want them warm and mailable NOT a burning hot gooey mess.
Working quickly, with a teaspoon scoop the warm rice krispie squares into the fingers of the glove.
Then move onto the main part of the hand. It is really important to look at the shape of your own hand so you can have a rough idea of how to bend the fingers.
You may need to put this back into the microwave several more times if the rice krispies cool before you have finished.
Leave the hand to completely cool before removing the glove with scissors.

As you can see with mine, I managed to break off a couple of fingers, this is because I made the error of putting icing sugar into my glove before filling it with rice krispies, this made it far to dry and meant some of my fingers fell off… its a zombie so actually its OK to have a few fingers missing Any large gaps fill them with thick royal icing before covering with modelling paste.
Cover your hand – I did this in stages doing the fingers first then the main part of the hand.
I then used a modelling tool to mark in the lines on the palm – again, look at your hand. 
Using the top of a table knife, press into the top of the fingers to make a nail bed.
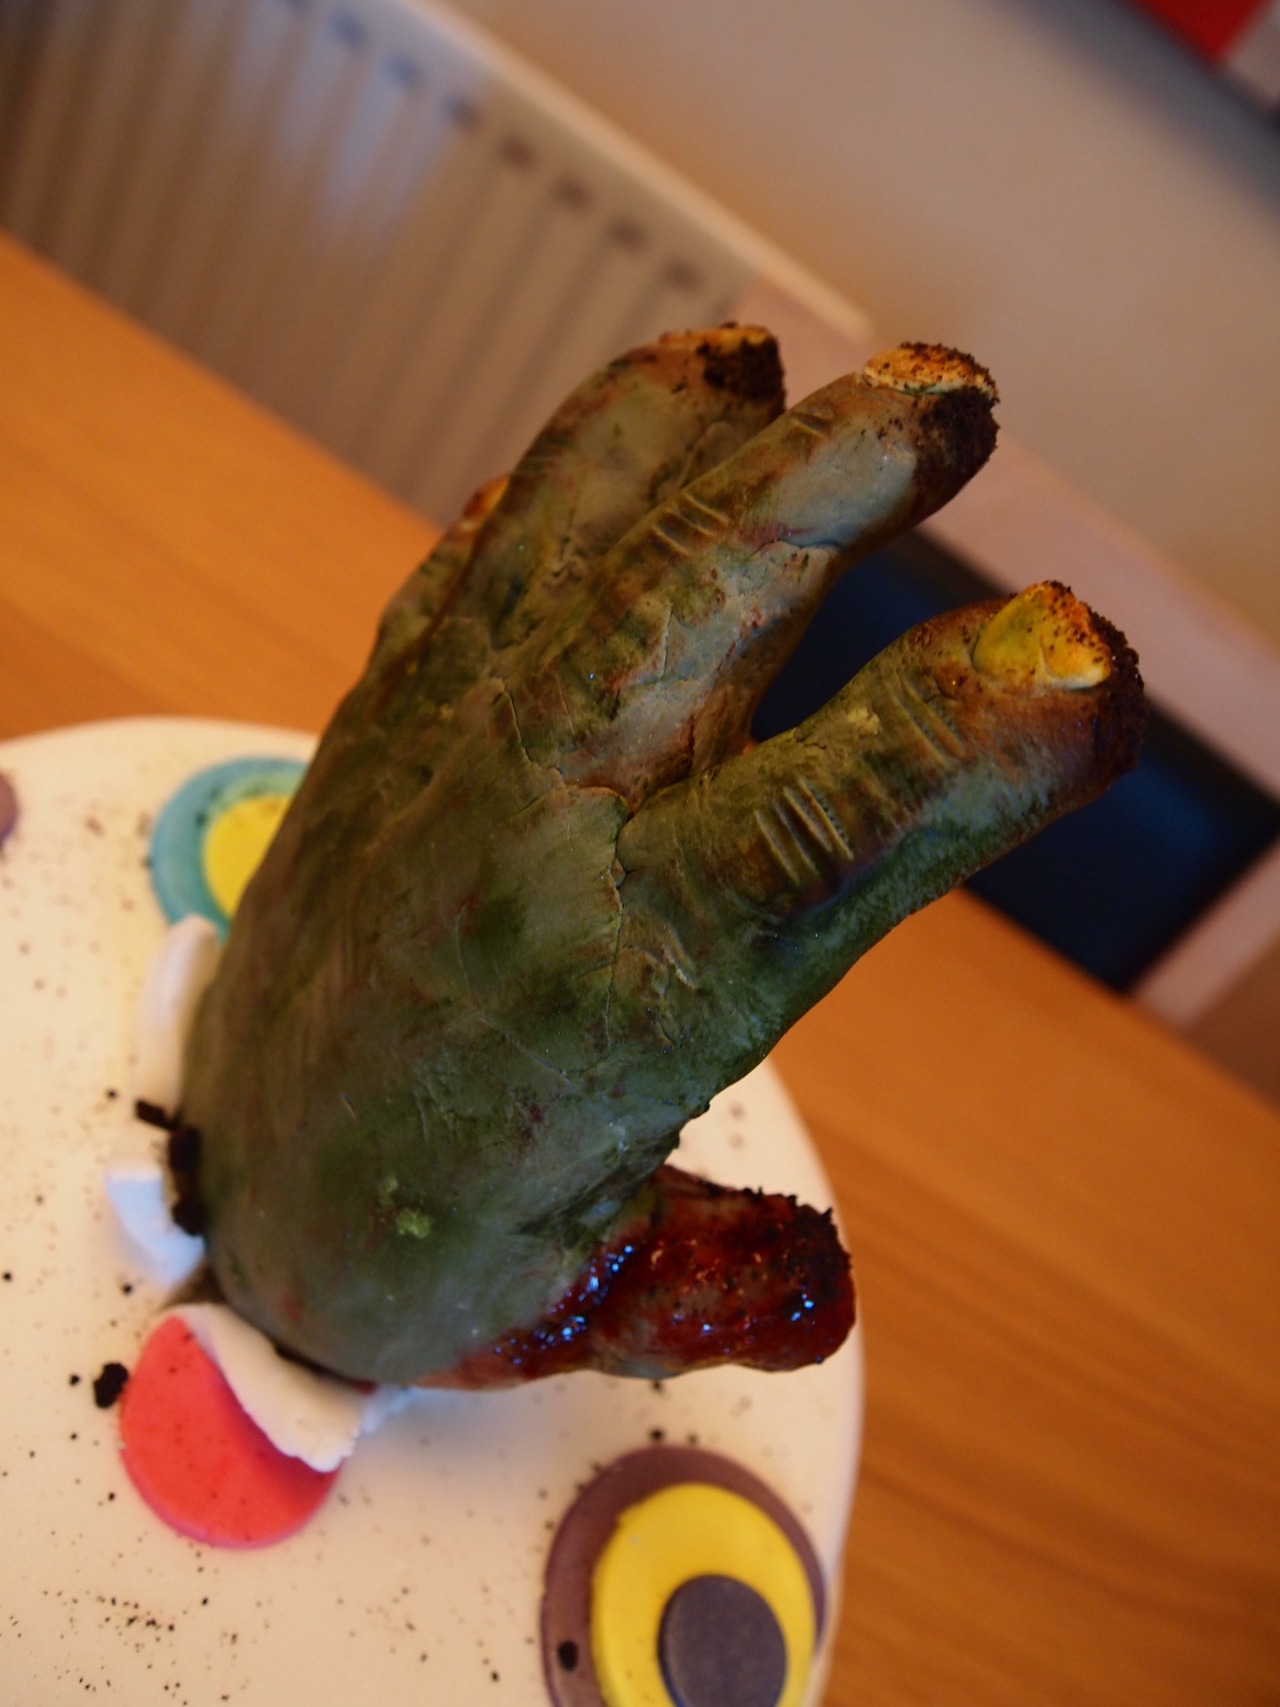
Add some gross looking nails by rolling a ball of sugar paste, flattening it and chopping in half. Stick this on with water.
Dust up your hand to make it look super disgusting, stick in the top of your cake!
I hope you have enjoyed the Halloween Tutorials- Happy Halloween!
