


When a friend of mine came to me and said “Rachel, I want a cake that is something to do with Game of Thrones. Do whatever you want” I got so excited at all the possibilities I could possibly make.
Personally, I blooming love Game of Thrones so this prospect made me very happy.
This being said, the main one idea that I kept coming back to was having a big throne right on the top. With some of the main house crests around the side and some delightful pools of “blood” dribbling down the side.

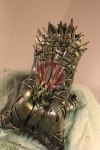
So here is the finished product, I was super pleased with how this turned out! Now slight disclaimer, I created the dramatic final look of the throne using an airbrush, a similar look could be achieved with metallic food paint and metallic dusts.
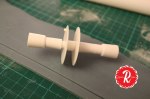
I needed the throne to be “lightweight” enough to sit on the top of the cake without causing any damage, as a block of icing this size would be pretty weighty and cost a fortune.
Inside were some homemade rice krispie squares- aka Melted marshmallow and coco pops.


Cut two squares and a third piece which is twice the size and a little curved on the top. Using your hands, mould these together.


Colour up some icing in a dark grey colour (You will notice mine tends to go a little more on the blue side towards the end but it didn’t matter as it all gets sprayed up anyway.)
Create 6 sausage shapes, attach 4 to the edges of the seat, and 2 to make the arm rests.
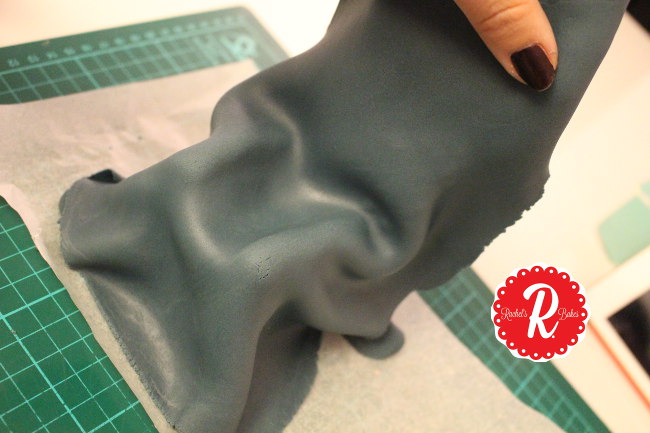 Cover the throne with a thin piece of icing like you would with a normal cake, don’t worry if not all of the throne is covered at this stage.

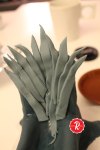
Using a ribbon cutter, cut lots of strips of the grey icing cut these strips into a range of different sizes, and cut the ends to a point.
Using water, stick these strips onto the throne starting at the top.


Attach more of the strips on the side and the back of the throne.
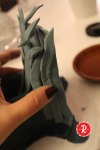
On the corners, cut smaller swords at attach with more water. Give everything a trim and a tidy up with a sharp knife.
Continue layering up your swords until you are happy with how it looks.
 Final touch is to add some smaller, thinner strips to act as handles and hilts to the swords.
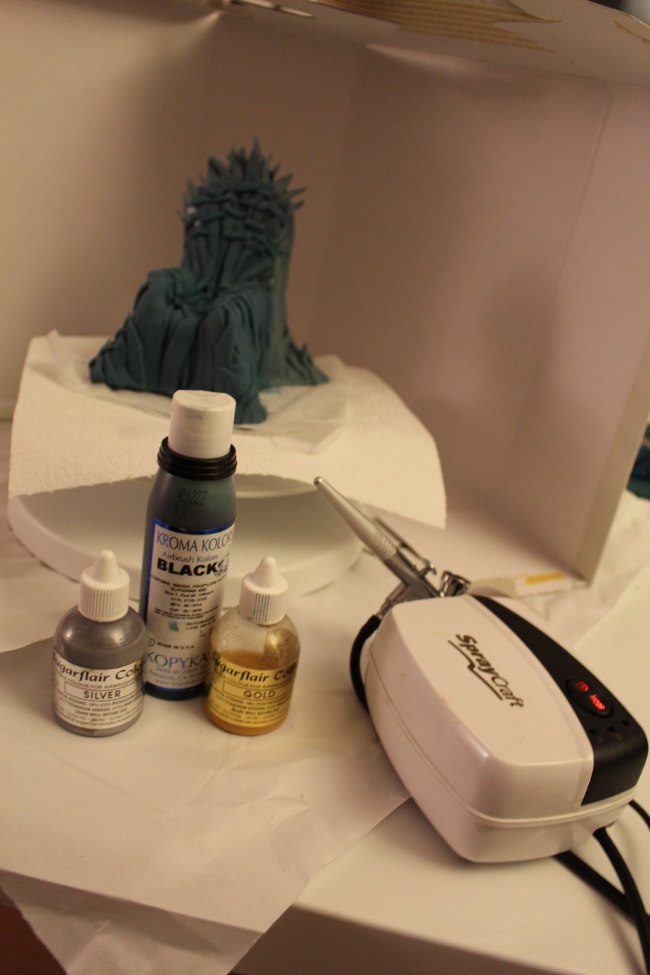 Set up your airbrush (or metallic paints if thats what you want to use) I used 3 colours- Black, Silver and Gold.
I also wanted to save my lovely white table so not only did I cover everywhere in sight with tissue paper, I also deconstructed a shoe box to act as a “splash guard” I also set up an icing turn table which made the whole process much easier.


Start by spraying the entire throne black. This stops the silver being too bright and gives more of an iron colour. Then give your throne a coat of silver.
Finally finish with a light covering if gold, focusing on bringing out some of the finer details of the throne.
Ta daaaa! Ready for whoever the rightful King (or Queen) should be!

Love your throne, I’m going to have a go for my son’s birthday cake. Thank you.
LikeLike
This is great! I would love to know how you got on!
LikeLike